This is such a wonderful recipe that works everytime. I got it from the blog honey & jam . She has such wonderful recipes on her site. Be sure and check it out.
No Knead French Bread
From Artisian Bread in 5 Minutes a Day via The Ivory Hut
3 cups of lukewarm water
1 1/2 tablespoons active dry yeast
1 1/2 tablespoons coarse salt
6 1/2 cups all-purpose flour
Grab a very large mixing bowl, or a large container that you can cover. In it, mix the water, yeast, and salt. You don’t have to heat up the water to a precise optimal temperature for the yeast. I’ve even used just regular tap water, and it’s worked well for me. Just let that sit together for a while (you don’t have to wait for the yeast to dissolve completely), then dump the flour all at once and stir with a wooden spoon. You don’t need to knead this, and you’re not looking to make it come together into a dough ball. You just want everything mixed well, with no streaks of flour left, and you’re done.
Leave it in your container, covered (but not airtight, or it’ll pop), for a few hours. When it has risen and then deflated a bit, your dough is done. It’s ready to be used or stored in the refrigerator.
To bake the bread, just grab a chunk of dough, about the size of a grapefruit. Dust your hands with flour to help prevent sticking, and gently pull the sides of the dough toward the bottom, rotating the dough, until you get a roundish shape with a smooth surface. It should only take you about a minute or less to do this. The dough won’t be entirely in the bottom, where it may look bunched up, but don’t worry about it.
Put it on a cutting board that’s been dusted with cornmeal to prevent sticking, and let it rest for at least 40 minutes. No need to cover it. If the dough has been refrigerated, it helps to let it rest a little more, until it’s no longer chilled.
Twenty minutes before you are ready to bake, put a cast iron skillet (or a pizza stone) in the middle rack of your oven, and put a broiler pan (I used a cookie sheet) in the bottom rack. Preheat your oven to 450 degrees. Dust some flour on the top of your loaf, and slash the top, about 1/4-inch deep.
After twenty minutes of preheating, it’s time to bake. (You can put the bread in after 20 minutes, even if your oven hasn’t reached 450 degrees yet.) Slide the loaf onto the baking stone, and then quickly pour 1 cup of hot tap water into the broiler pan. Then quickly shut the oven door to keep the steam inside.
Bake for 30 to 40 minutes, until you get a nice brown crust.
Tuesday, October 12, 2010
Thursday, October 7, 2010
Apple Orchard
Today I visited and Apple orchard with my sweet Carson and the entire kindergarten.


We had such a beautiful day to go, the weather was perfect.


All of the kiddos left with a pumpkin and a bag of apples. So now I get to make all kind of apple creations. There are apples cooking on my stove right now. YUM!


Thursday, September 30, 2010
Pumpkin Board

To help with storage I put it on the back of the Patriotic board.

Wednesday, September 29, 2010
Pumpkins

1. Cut your fabric in whatever shape you want your pumpkin. Place right sides together.


5. Make a stem by cutting fabric in a rectangle and sewing all but the bottom part. Flip the right side out by using scissors if you need to.


Friday, August 27, 2010
1st day of school

Mommy with her babies!

Daddy and his babies!
Wednesday was a day filled with many emotions. Our baby was starting kindergarten! Where had the time gone. I had been at home with a child for over 10 years and now in a moment life was changing. Carson was thrilled to be going to school just like Savannah and Connor. Thank goodness my wonderful husband took the day off to spend with me or I think I would have been a huge puddle in the school parking lot.
We are all looking forward to this new stage of life we are starting.


Monday, July 19, 2010
Bruschetta
 What to do with all of the tomatoes? I love, love, love tomatoes. I had a friends say on facebook that she was making bruschetta which I love but have never made. She shared the recipe with me yesterday so we made this for dinner tonight. Let me just say it was fabulous!! My kids could not get enough of this. So I know now what I will be making a lot of now. I hope she doesn't care that I shared. Thanks Heather!
2-3 seeded & chopped tomatoes
3 TBSP chopped fresh basil
1 TBSP balsamic vinegar
2 TBSP olive oil
Finely chopped clove of garlic
Salt & pepper to taste
~Mix all of these ingredients and refrigerate for a few hours
~Slice a French baguette and butter slices (you could use a garlic spread instead of butter); broil until golden brown
~Top with the tomato mixture and sprinkle with fresh Parmesan (I like to stick it back under the broiler for another minute)

Friday, July 9, 2010
Couponing 101
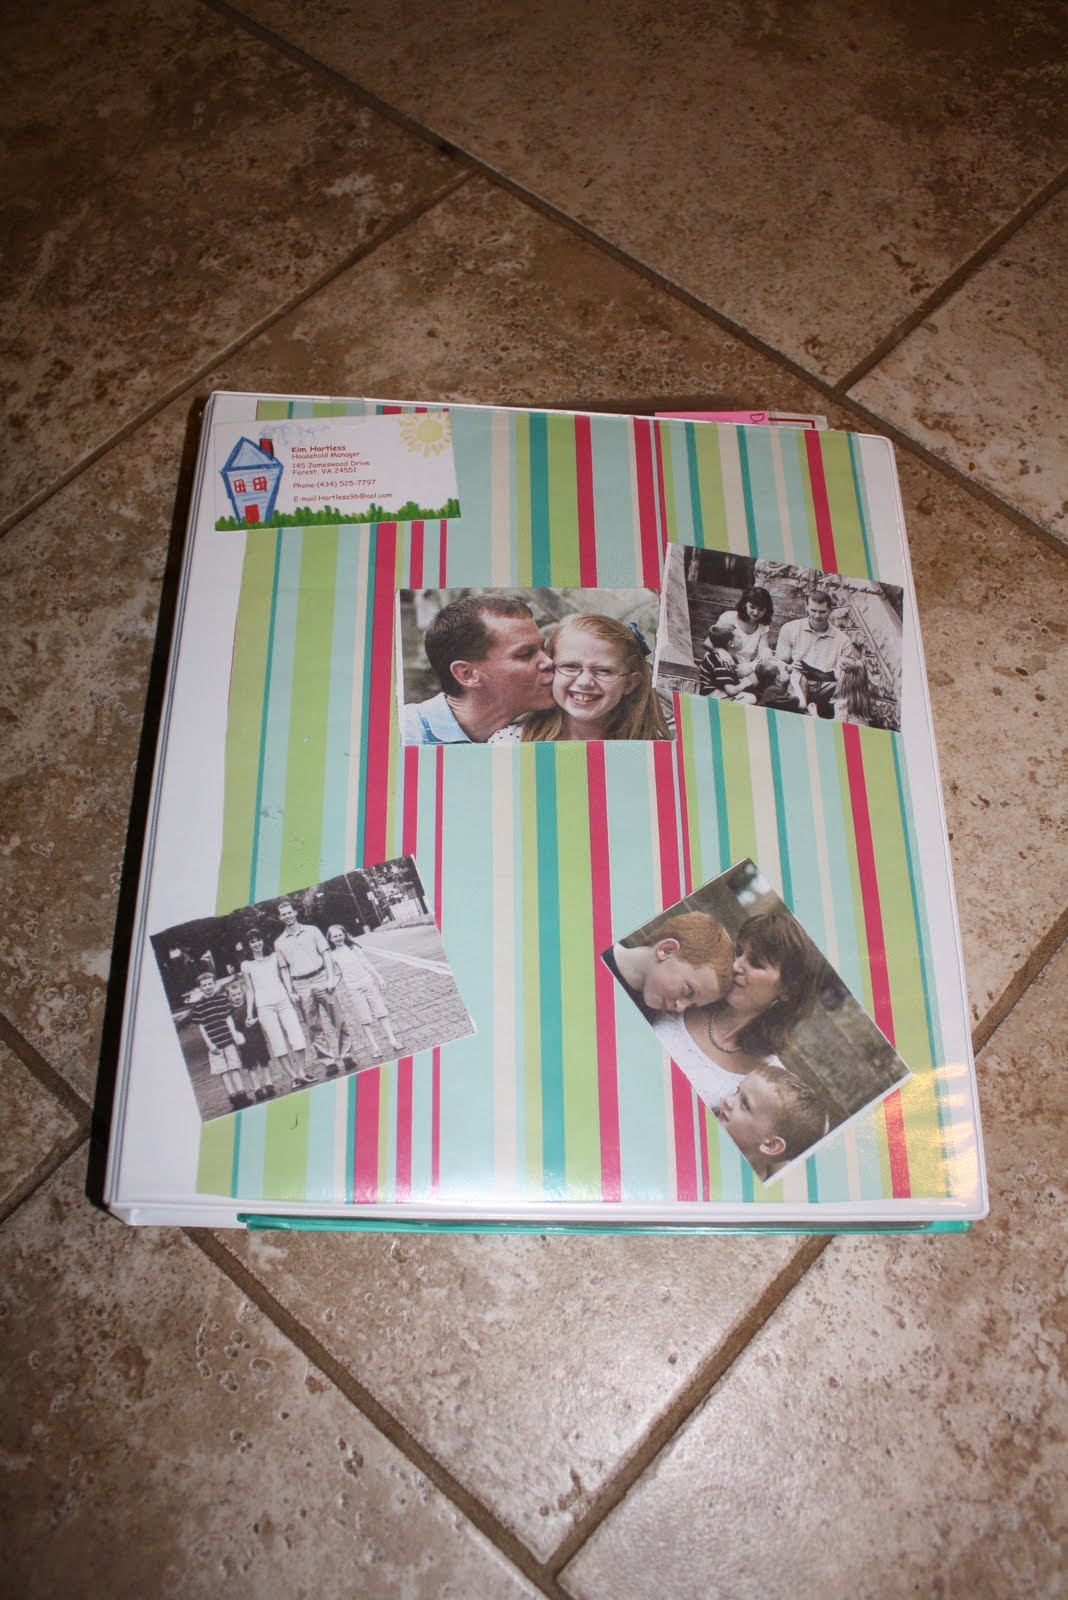
This is my second coupon book. A few weeks ago I must have left mine in a cart at a store, when I realized it was gone I started checking stores I go to and there was no sign of it. Somebody must have hit the jackpot because it was FULL of coupons! I keep trying to remind myself not to get mad about losing it, someone may have needed it more than me. A very sweet friend surprised me and made me a new one. She even decorated it for me with my family pictures. This time I put my business card at the top and taped it in so it is easier to see. I carry this book everywhere that I shop. You may know this but you can combine a store coupon with a manufactures coupon at most places. Take advantage of this. Go through your adds such as Walgreens on Sunday and see what coupons you can stack. This can really save lots!
I use a plain notebook and baseball card holders. I have each section divided into categories such as pantry, dairy, freezer, cereal, toiletries, cleaners,produce.


Here are a few websites I use a lot to help me.
Hip2save.com
couponingtodisney.com
southernsavers.com
shesaved.com
Saveathomemommy.com
If you have any questions about any of this please let me know.
Thursday, July 8, 2010

Wednesday, July 7, 2010
DC Trip
Last week our family headed up to DC for a few days. My husband's brother and his family live near there so it was a time to visit family. We decided to go into downtown DC for a tour. We went on the DC Duck tour. This is an amphibious vehicle that tour you around all over DC then turns into a boat and you float down the Potomac River.
 We were able to see all the sights in DC. With a total of 6 children this is the way to go. Our next visit we will go to a museum, but this was a good way to break them in to all there was to see.
 Union Station
 Capital
 White House
 Lincoln Memorial
 Washington Monument


 The yellow things in the boys mouths they called "quackers" These make duck sounds that will drive you up a wall but the kids loved them!
 The kids had a wonderful time with their cousins!


Tuesday, July 6, 2010
Homemade Ice Cream

2 cans evaporated milk
1 pint whipping cream
2 1/4 cups sugar
dash salt
3 tsp vanilla
4 eggs
Combine all ingredients and cook on medium heat on the stove. I cook it until it is warm about 10 minutes. Pour through a stainer into a large bowl to make sure there are no cooked eggs floating around in it. Refrigerate overnight.( If you want fruit in your ice cream add 1 cup of chopped fruit before putting in your ice cream freezer.) Add the mixture to your ice cream freezer and fill will whole milk about 1 inch from the top. (Usually there is a fill line in the freezer) Follow the manufactures directions for your freezer and then enjoy your homemade ice cream!

Thursday, June 24, 2010
Howdy Wreath
My week has been consumed this week with Vacation Bible School at our church. The theme this year was a western theme. This was one of the wreaths I made for decoration for the week. It was very simple to do. I had a grapevine wreath from the goodwill store. I tied strips of burlap and red material around the vines. Then I cut the letters HOWDY out with my cricut machine, put them on a scrap piece of wood and tied it on with twine. So simple and very cheap to make. I plan on using this on my door when VBS is over with.

Sunday, June 20, 2010
Family Pictures


Saturday, June 19, 2010
What a week!
Last week I was visiting family in NC. My sister needed help clearing brush ( which I was happy to do) A few days later Poison Ivy popped up on my leg and continued to spread to the other leg and no medicine was helping. Off to the Doctor I go steroid shot and cream. The next morning I get up itching all over my stomach and back and a blotchy rash all over so back to the Doctor I go. He is not sure what the rash is so sends me to the dermatologist. The PA at the office had to get the Doctor in and they think I have to many histamines in my body.( Apparently I am strange) So now I am on 3 antihistamines, which makes me sleepy, a spray, and prednisone (which will probably make me crazier). So there is my pity party for the weekend.
My family went to see Toy Story 3 today and I couldn't go because I would look like a freak scratching myself. They did say it was really good. I was able to watch a couple of movies here. I liked Valentines Day, it was a cute movie, but my husband would have hated it. So it was good I watched this movie alone.

 Next I watched Julie and Julia, which I thought was fabulous!! I love to cook so I enjoyed that part of the movie. Also, as a blogger it is very inspiring if you haven't seen it you should rent it!
My family went to see Toy Story 3 today and I couldn't go because I would look like a freak scratching myself. They did say it was really good. I was able to watch a couple of movies here. I liked Valentines Day, it was a cute movie, but my husband would have hated it. So it was good I watched this movie alone.
Next I watched Julie and Julia, which I thought was fabulous!! I love to cook so I enjoyed that part of the movie. Also, as a blogger it is very inspiring if you haven't seen it you should rent it!Sunday, June 13, 2010
Trip
I haven't posted in a couple of weeks because of a trip to visit family. Hopefully next week I will get my act together and start blogging again.
Saturday, May 29, 2010
Pre school graduation
That's my baby boy holding the flag at his preschool graduation. These years have gone by so fast. We have been so blessed to have him at a wonderful preschool where he has grown so much! Congratulations Carson!!

Friday, May 28, 2010
Patriotic Board


Here is my finished project.

")
Subscribe to:
Posts (Atom)